Guides · Getting started
How to Field Dress a Deer
It takes about twenty minutes, it is far less unpleasant than you are imagining, and doing it promptly is the difference between good venison and wasted venison.
Disclosure: Creek Cover is reader-supported. If you buy through our links we may earn a commission, at no extra cost to you. It never changes which pick we tell a beginner to start with. Full disclosure.
Quick picks at a glance
Tap a pick to read the full write-up, or the price button to check it on Amazon.
- 1
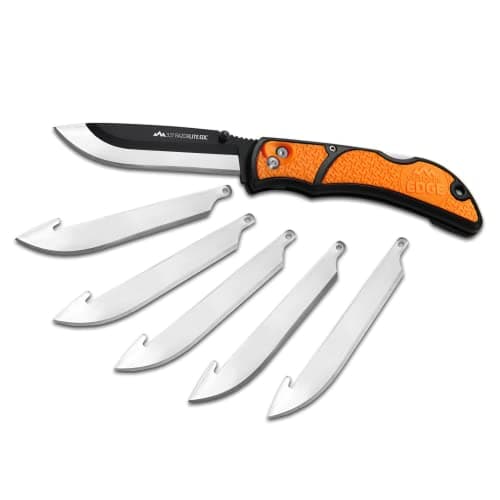
Replaceable surgical blades mean you never work with a dull edge, which is both faster and considerably safer. The standard modern answer for field dressing a first deer.
Best for: The knife to do this with9.3 - 2
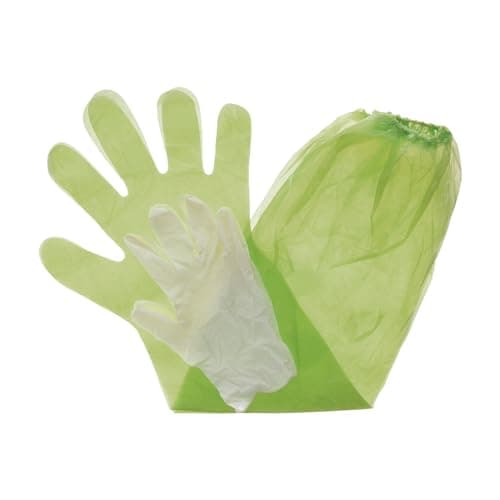
Shoulder-length disposable gloves for under seven dollars. They keep you clean, keep the meat clean, and provide a real barrier against the bacteria and parasites that come with handling a gut cavity.
Best for: Keeping the job clean and safe9.0 - 3
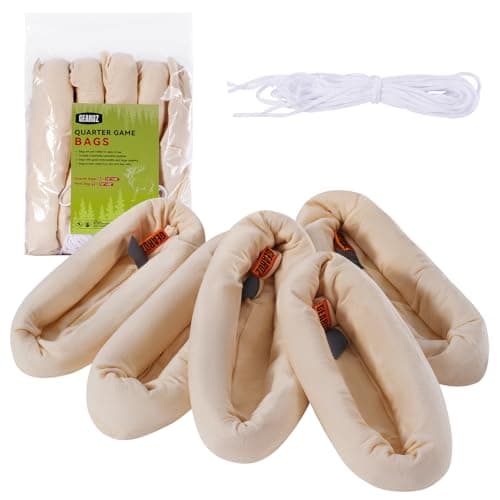
Breathable reusable bags that keep flies and dirt off while still letting the meat cool. One pack covers a whole deer with a bag spare.
Best for: What the meat goes into next9.0 - 4
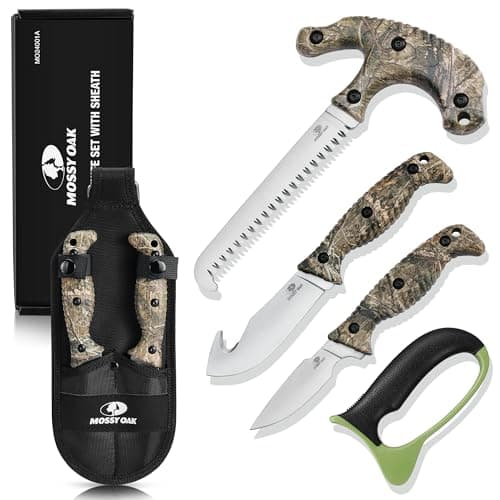
A gutting knife, a caping knife, a bone saw and a sheath in one package. If you would rather buy the whole job at once than assemble it piece by piece, this covers it.
Best for: Best all-in-one kit8.5
| # | Product | Best for | Score | Price |
|---|---|---|---|---|
| 1 | Outdoor Edge RazorLite EDC Replaceable-Blade Knife Replaceable surgical blades mean you never work with a dull edge, which is both faster and considerably safer. The standard modern answer for field dressing a first deer. | The knife to do this with | 9.3 | $34.94View on Amazon#ad |
| 2 | HME Game Cleaning Gloves, Shoulder-Length, 4-Pack Shoulder-length disposable gloves for under seven dollars. They keep you clean, keep the meat clean, and provide a real barrier against the bacteria and parasites that come with handling a gut cavity. | Keeping the job clean and safe | 9.0 | $5.66View on Amazon#ad |
| 3 | GearOZ Game Bags, 5-Pack Reusable Quarter Bags Breathable reusable bags that keep flies and dirt off while still letting the meat cool. One pack covers a whole deer with a bag spare. | What the meat goes into next | 9.0 | $23.99View on Amazon#ad |
| 4 | Mossy Oak 4-Piece Field Dressing Kit with Sheath A gutting knife, a caping knife, a bone saw and a sheath in one package. If you would rather buy the whole job at once than assemble it piece by piece, this covers it. | Best all-in-one kit | 8.5 | $35.99View on Amazon#ad |
Field dressing means removing the internal organs so the carcass can cool. That is the entire purpose — a deer’s body cavity holds a great deal of heat, and meat that stays warm spoils. Everything below is in service of getting that heat out quickly and keeping the meat clean while you do it. It takes about twenty minutes the first time, and this page is written assuming you have never done it and would rather know the order before you are standing over an animal in the dark.
What to carry
A short list, all of which fits in a daypack: a sharp knife and a spare blade, a pair of shoulder-length gloves, three feet of paracord, game bags, a headlamp, a few paper towels or a rag, and your tag plus whatever your state requires you to attach to the animal. A bone saw is optional for field dressing and necessary if you are going to split the pelvis or quarter the deer where it lies.
Before you start
Confirm the animal is dead. Approach from behind and above, watch the chest for movement, and touch an eye with a stick before you put a hand on it. This is not theatrics — a wounded deer that gets up while you are kneeling over it is genuinely dangerous.
Tag it. Most states require the tag to be attached immediately and before you move or dress the animal, and the specific requirement is in your annual regulations — see hunting license basics for where to find them. Do this first, every time.
Position the deer. On its back, head slightly uphill if there is any slope, so gravity works with you and the blood drains away from the cavity you are opening. If you can, prop it with a log or knee under one shoulder to keep it from rolling.
The steps
1. Open the abdomen without opening the stomach. This is the whole skill. Pinch the hide at the base of the sternum and lift it away from the body, then make a small cut through the hide only. Turn the knife blade up, put two fingers in the opening on either side of the blade, and use your fingers to lift the abdominal wall away from the organs as you cut backwards toward the pelvis. Your fingers are the guide that keeps the blade off the stomach and intestines.
2. Free the diaphragm. Reach forward into the chest cavity and cut the thin sheet of muscle that separates the chest from the abdomen, working around both sides of the body wall. This is what lets the whole organ mass come out as one piece.
3. Cut the windpipe and gullet. Reach as far up the neck as you can, get hold of the windpipe and esophagus together, and cut them off above your grip. Grab them and pull down and back — the lungs, heart and everything behind them will follow.
4. Free the rear. Cut carefully around the anus and, on a doe, the vulva, working a circle to free the last section of the colon. Tie it off with a short length of paracord before you pull it through into the cavity — that knot is what stops the contents spilling onto meat.
5. Roll it out. Tip the deer onto its side and roll the entire organ mass out. Save the heart and liver if you want them; put them in a bag rather than back in the cavity.
6. Drain and prop. Roll the carcass belly-down for a minute to drain, then prop the cavity open with a stick so air can circulate. Wipe out any loose blood with paper towel. Do not rinse with water unless you can dry it afterwards — water on meat surfaces encourages bacteria unless the surface can dry.
If you cut the stomach or intestine, do not panic
The two mistakes that ruin venison
Waiting. Every minute a deer lies undressed, the cavity is holding body heat against the meat. On a warm afternoon this becomes urgent within an hour. The single most useful thing a beginner can internalize is that field dressing is not a chore to get to eventually — it is the clock starting.
Sealing warm meat in plastic. The instinct after all that work is to bag everything up tight. Plastic traps heat and moisture against the meat and it will sour from the inside where you cannot see it. Breathable game bags only, then ice.
| Air temperature | How long you have | What to do |
|---|---|---|
| Below 40F | Overnight is fine | Hang it, prop the cavity, let it cool |
| 40-50F | Several hours | Get it to a processor or on ice the same day |
| 50-60F | Two to three hours | Quarter it and get it on ice |
| Above 60F | Under two hours | Quarter and ice immediately - do not drive it home warm |
After: cooling, hanging and getting it home
Cool air is what you are after, not cold water and not a sealed cooler. If the temperature is below about 40F, hanging the deer with the cavity propped open overnight is ideal and it starts the aging that improves the meat. Above that, the meat needs ice — which usually means quartering it, bagging the quarters, and getting them into a cooler with the drain open so it is not swimming in meltwater.
Two practical notes for the drive home. Do not lay a warm deer flat in a truck bed on a warm day — the underside cannot cool and that is where you will find the problem. And do not tie it to the roof; besides being unpleasant to look at, engine and sun heat is exactly what you are trying to avoid. If you are packing meat out of public ground on your back, quartering and bagging at the animal is usually easier than dragging, and it gets the meat cooling sooner.
Finally: if this is your first deer and you are not confident, take it to a processor. Nothing about that is a failure — most hunters use one, they charge a modest fee, and a first deer handled properly by someone else is a much better outcome than a first deer handled badly by you. Learn the butchering on a second animal when there is less at stake. The rest of the first-season sequence, from stand setup onward, is in deer hunting for beginners.
The picks in detail
Outdoor Edge RazorLite EDC Replaceable-Blade Knife
9.3/10Best for: The knife to do this with
Replaceable surgical blades mean you never work with a dull edge, which is both faster and considerably safer. The standard modern answer for field dressing a first deer.
- Type
- Replaceable-blade folder
- Blade
- Surgical, snap-in
- Sharpening
- None required
- Best for
- Field dressing and quartering
- Always sharp, so you never force a cut
- No sharpening skill required in the field
- Spare blades weigh nothing
- Blades are thin and will snap if you pry with them
- Ongoing cost of replacement blades
HME Game Cleaning Gloves, Shoulder-Length, 4-Pack
9.0/10Best for: Keeping the job clean and safe
Shoulder-length disposable gloves for under seven dollars. They keep you clean, keep the meat clean, and provide a real barrier against the bacteria and parasites that come with handling a gut cavity.
- Pack
- 4 pairs
- Length
- Shoulder length
- Type
- Disposable, elastic banded
- Best for
- Every field dressing job
- Genuine hygiene barrier, not just tidiness
- Shoulder length is what the job actually needs
- Cheap enough that there is no excuse
- Thin - they tear on bone edges
- Reduce dexterity slightly on fine cuts
GearOZ Game Bags, 5-Pack Reusable Quarter Bags
9.0/10Best for: What the meat goes into next
Breathable reusable bags that keep flies and dirt off while still letting the meat cool. One pack covers a whole deer with a bag spare.
- Pack
- 5 bags
- Fabric
- Breathable, reusable
- Sized for
- Elk quarters - deer with room
- Best for
- Everything after the field dressing
- Breathable, so the meat cools instead of sweating
- One pack is one deer
- Washable and good for several seasons
- Oversized for a small deer
- You supply the cordage to tie them
Mossy Oak 4-Piece Field Dressing Kit with Sheath
8.5/10Best for: Best all-in-one kit
A gutting knife, a caping knife, a bone saw and a sheath in one package. If you would rather buy the whole job at once than assemble it piece by piece, this covers it.
- Pieces
- 4, plus sheath
- Includes
- Knives and bone saw
- Carry
- Belt sheath
- Best for
- Buying the whole kit at once
- Includes the bone saw most beginners forget
- One purchase covers the whole job
- Sheath keeps it all together in a pack
- Fixed blades need sharpening, unlike the RazorLite
- More knife than most people use
Prices shown are from Amazon as of Sep 5, 2026 and change often — the button always goes to the current listing. Some links may earn us a commission at no extra cost to you. How this works.
Frequently asked questions
How long can you wait to field dress a deer?
Less time than most beginners think, and it depends entirely on temperature. Below 40F you have overnight. Between 50 and 60F you have two to three hours. Above 60F you have under two hours before the meat is at real risk. The body cavity holds heat against the meat, which is exactly what field dressing removes.
What do you need to field dress a deer?
A sharp knife with a spare blade, shoulder-length disposable gloves, about three feet of paracord to tie off the colon, breathable game bags, a headlamp, paper towels, and your tag. A bone saw is optional for field dressing and necessary if you intend to split the pelvis or quarter the animal on site.
What happens if you cut the stomach field dressing a deer?
It is recoverable. Get the spill out of the cavity, wipe it out thoroughly with paper towel or clean snow, and get the animal cool quickly. Trim generously around any contaminated area when butchering. What ruins meat is contamination sitting warm for hours, not the fact that it happened.
Should you wash out a deer after field dressing?
Only if you can dry it afterwards. Water left on meat surfaces encourages bacterial growth, whereas a dry surface forms a protective crust. Wipe the cavity out with paper towel instead, prop it open with a stick so air circulates, and let it cool.
Do you need to field dress a deer before taking it to a processor?
Almost always yes, unless the processor is very close and the weather is cold. The cavity has to be opened for the carcass to cool, and most processors expect to receive a field-dressed animal. Call ahead if you are unsure - it is a normal question and they answer it several times a day in season.
Sources
Keep reading
Not sure where to start?
The beginner gear checklist walks you through exactly what a first-season hunter needs — essentials first, nice-to-haves later, with one safe-default pick per category.